

Step-by-Step Guide to Your First Jenkins Project

🚀 Sagar Shah 🚀
💻 DevOps Engineer 💡 🌐 Automating the digital universe, one script at a time ⚙️ 📚 Passionate learner and tech enthusiast 🤓 ☁️ Cloud explorer, making servers dance in the cloud 🌥️ 🛠️ Building bridges between development and operations 🌉 📖 Sharing insights and knowledge on all things DevOps 📢 🌟 Let's transform the world of IT together! ✨
Introduction
Jenkins, the stalwart of continuous integration and deployment, is here to simplify your development life! In this blog post, we'll embark on a journey to create a basic Jenkins project using a Freestyle job. Buckle up, and let's dive into the world of automation.
Get ready as we break down each section of the Freestyle project configuration to empower your Jenkins journey! 🛠️
Before we dive into the details, ensure you have Jenkins installed on your AWS Ubuntu EC2 instance. If not, check out this step-by-step Jenkins setup tutorial to get started.
Setting the Stage
General Section 🌐
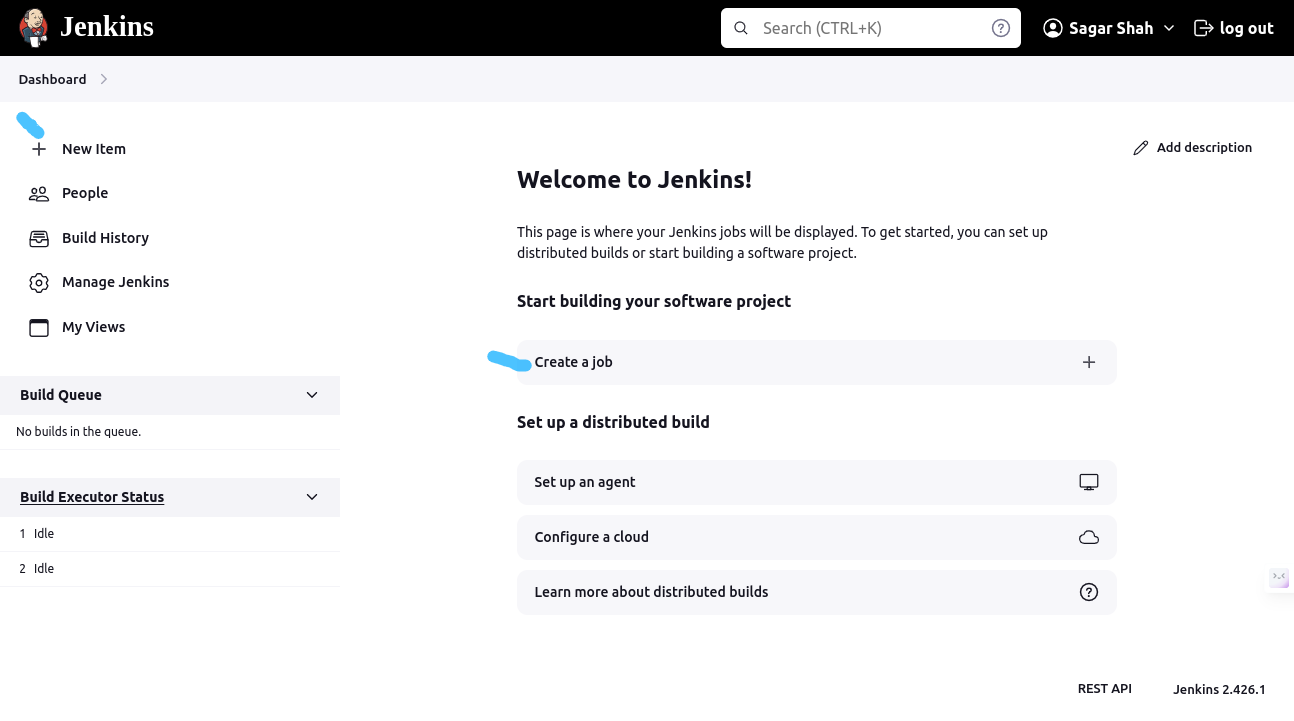
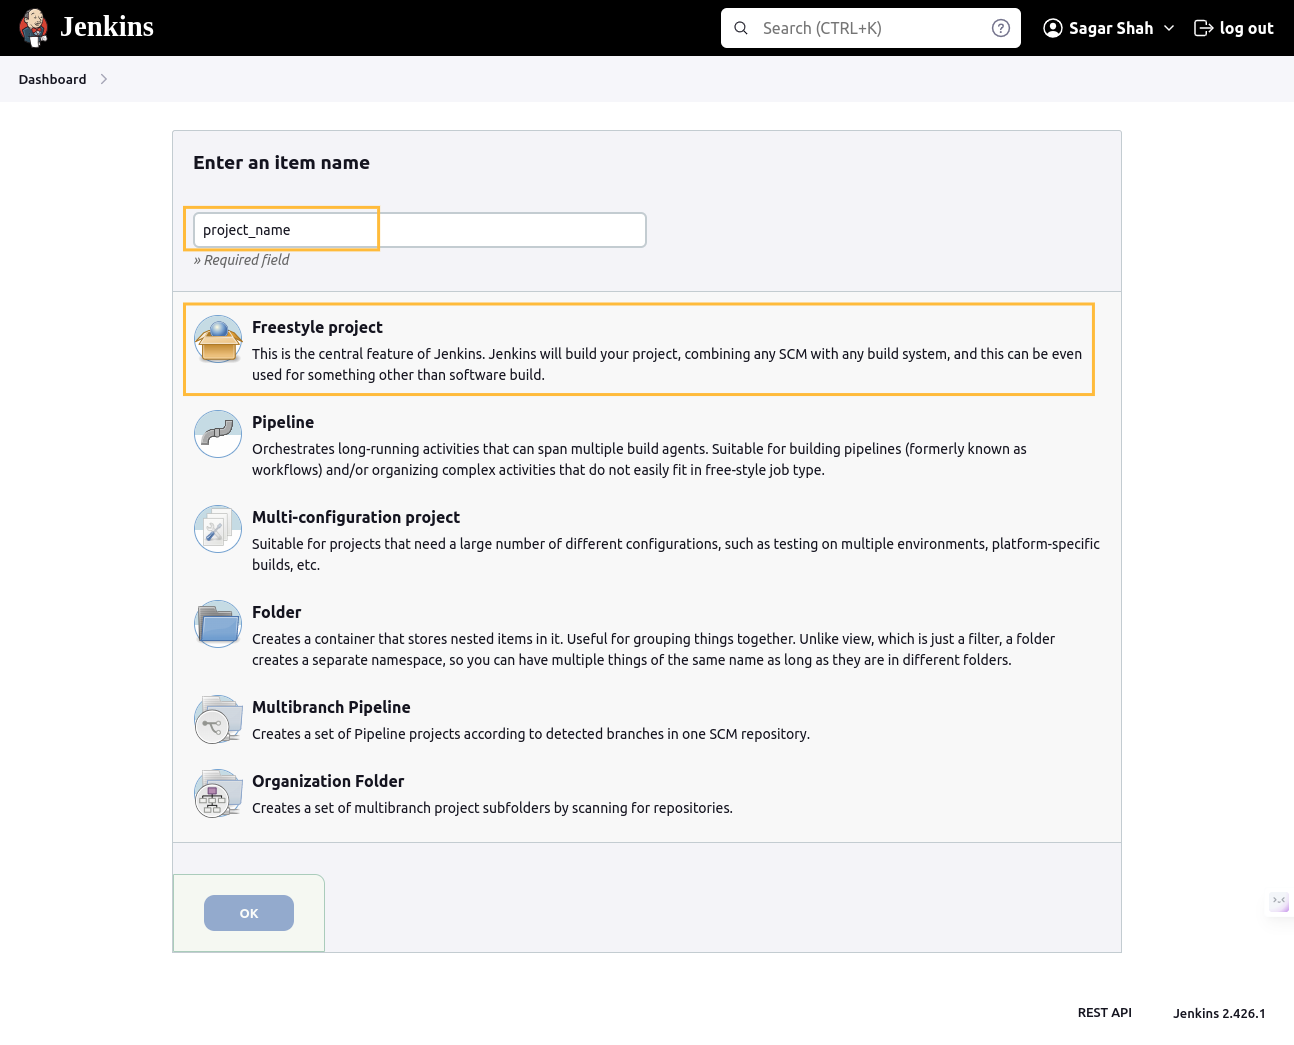
In the Jenkins job configuration, start by clicking on New Item or New Job. Choose the Freestyle project and give your project a name. This is the first step in laying the foundation for your CI/CD pipeline.
Description 📝: Provide a brief description of your project, setting the stage for what it's all about.
Discard Old Builds 🗑️: Keep things tidy by automatically discarding old builds after a set number, ensuring your workspace stays clutter-free.
GitHub Project 🐙: If your code resides on GitHub, link your project to its GitHub counterpart for seamless integration.
This Project is Parameterized 🎛️: Add flexibility by enabling parameterization, allowing users to input values during the build process.
Throttle Builds ⚙️: Control the number of concurrent builds, preventing resource overload.
Execute Concurrent Builds if Necessary 🚦: Allow multiple builds of the project to run simultaneously if needed.
Source Code Management 🛠️
None 📁: If you're not using any version control system, select "None." Otherwise, choose your preferred SCM, such as Git.
Git 🔄: If you're using Git, provide the repository URL and specify the branches to build.
Build Triggers 🚀
Trigger Builds Remotely 📟: Enable remote triggering of builds for automation purposes.
Build After Other Projects Are Built 🚧: Specify projects that should trigger a build upon successful completion.
Build Periodically ⏰: Set up scheduled builds for regular, automated releases.
GitHub Hook Trigger for GITScm Polling 🎣: Integrate with GitHub to trigger builds on code changes.
Poll SCM 🔄: Periodically poll the source code repository for changes and trigger builds when necessary.
Build Environment ⚙️
Delete Workspace Before Build Starts 🧹: Ensure a clean slate by deleting the workspace before initiating a new build.
Use Secret Text(s) or File(s) 🔐: Securely pass sensitive information to the build process.
Add Timestamps to the Console Output 🕒: Keep track of when things happen by adding timestamps to the console output.
Inspect Build Log for Published Build Scans 🕵️: If using Gradle, inspect the build log for published build scans.
Terminate a Build if It's Stuck 🚨: Prevent Jenkins from hanging indefinitely if a build gets stuck.
Build Steps 💻
Execute Shell 🐚: The moment of truth! Define shell commands to be executed during the build process. For practice, try a simple
mkdircommand to create a directory.Command 📜: Enter the shell commands you want Jenkins to execute, like:
mkdir my_workspaceAdvanced Settings ⚙️
The Advanced section houses additional settings for customizing your build environment further. Explore these options as you become more comfortable with Jenkins.
Post-build Actions 🚀
Congratulations on reaching the finale! The Post-build Actions section is where the magic happens after the build completes:
Archive the Artifacts 🗃️: Preserve essential files after a successful build.
Publish JUnit Test Result Report 📊: Share detailed test reports.
Email Notification 📧: Keep your team in the loop by configuring email notifications.
Publish HTML Reports 🌐: Showcase HTML reports generated during the build.
Deploy to Container 🚢: If applicable, deploy your artifacts to a web container.
Trigger Parameterized Build on Other Projects 🎛️: Orchestrate a series of related builds.
Git Publisher 📤: Push changes back to the repository or update Git tags.
Join Trigger 🔄: If using the "Join" plugin, specify conditions for joining multiple builds.
Conditional Actions Based on Build Status 🎭: Execute actions based on the build result, ensuring flexibility in your CI/CD pipeline.
Conclusion
You've just taken the first steps in setting up your Jenkins project! 🎉 The road ahead holds endless possibilities for automation and streamlining your development workflow. Stay tuned for more Jenkins adventures as you explore advanced features and build robust pipelines.
Happy building! 🚀🛠️👩💻👨💻